Exploring Draenor: Cave of Betrayal
by JR Cook - 9 years ago show comments
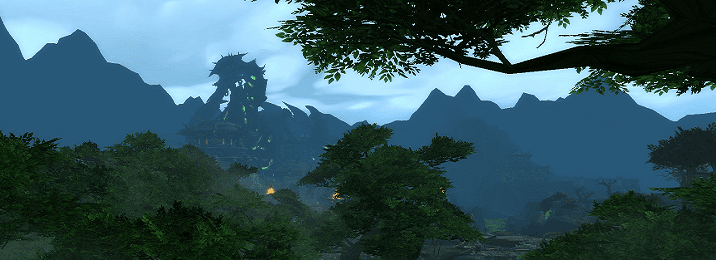
Exploring Draenor delves into the hidden places of the world that will one day become Outland. From the volcanic landscape of Frostfire to the gloomy dells of Shadowmoon, these articles are your guide to events that are off the beaten path.
Location: South-west Zorammarsh
Rewards: Gold, Garrison Resources, Brazier of Awakening, Ogra’mal Snake Charming Flute, chance at Murktide’s Coveted Chestplate, Ghostly Iron Buccaneer’s Hat and Equipment Blueprint: Ghostly Spyglass
Tanaan Jungle has been available on live realms for several weeks. By this point, you likely already have your daily route down pat (and a way to get around it quickly), and you’re likely approaching the point at which gear isn’t an issue. With that in mind, we’re going to explore a pirate cave – just for the hell of it, because who doesn’t love pirates? Oh alright, there might be some sweet loot involved, too…
Ironbeard’s the name and betrayal’s the game – the first clue coming in the name of this sub-zone, the Cave of Betrayal, and the second coming in the massive treasure chest you can see just out of reach in the middle of the cave: Ironbeard’s Treasure. It’s a subtle hint, but I think that most of you are savvy enough to pick up on it.

The Cave is an old pirate hideout, where the orc seadogs hid their treasure. In fact, you can find three Stashed Iron Sea Booty in the main cavern, alone. To reach that particular area, go left from the entrance and through the Grotto of the Double-Crossed Captain. This is where Ironbeard himself met his end. The Grotto demonstrates one of the tenets of Tanaan Jungle: stories are shown, not told. The skeletons and weapons scattered around the floor and walls speak volumes about what happened here: the corpse of Ironbeard lies with a spear through his back, clearly demonstrating how the cave got its name,
Following the path around further takes you to the largest cavern in the cave (going right at the entrance will get you to the same place, but skip the Grotto). Take a moment to appreciate this place: it’s beautiful. Deep water covers the floor, concealing several shoals of aggressive fish – and the way to the treasure chest seen at the start of the area. First, though, you can reach the Iron Sea Booty chests around the walls with some clever jumping, and the large chest in the middle (another Ironbeard’s Treasure) by following the below path along the east wall.

Opening the chest will not reward you with delicious loot. Instead, you’re left facing a particularly angry lobstrok named Glub’glok. Like many other lobstroks in Warlords of Draenor, Glub’glok will attack you with Gushing Wound and Crush Armor. His (her? How do you tell when the subject is covered in a chitinous exoskeleton?) unique ability is Cavitation Blast, which effectively means that you suffer from the bends (a cavitation is literally the formation of a cavity in a liquid or solid).
Glub’glok has a very small area to kite in, but doesn’t hit especially hard. Kill the big red lobster man (let’s settle on the male pronoun for now) and steal his stuff, then jump off the island onto the rocky ledge to the west. There are two more Iron Sea Booty chests here. Loot them, then head back around to the east wall.
Once you’re back on the other side of the cave, take a breath and dive in to the water. Fight off any curious fish – you’re looking for a gap in the wall of the cave, beneath one of the jumps you made to reach Glub’glok’s island. A barrel on the floor of the pool marks the entrance. Once you find it, swim inside and up into the secret grotto.
From here, you can swim to the left or right side. Both are scenic, but the left side holds the path you need. Once again, jump between the rocky ledges, following them upwards until you land on the lower part of a rotting wooden staircase. From here, you can loot the final Ironbeard’s Treasure, from the start of the dungeon.*
Wait a minute – Captain Ironbeard, I hear you cry? He’s a rare in Nagrand, isn’t he? Well remembered! Yes, the Scourge of the Iron Seas first appears as a reference to Captain Ahab of Moby Dick fame in Nagrand – he is obsessed with the White Kraken. Killing him (avoiding Shrapnel Blast and High Explosive Grenade in the process) will reward you with Ironbeard’s Blunderbuss and a chance at the Iron Bucceneer’s Hat.
It’s obvious that there’s a story here, and you can find out more by putting some pieces together. ‘Captain Ironbeard’ is, in reality, an orc named Torglork – the first mate of the original Ironbeard. Not only does Nagrand’s Ironbeard aggro quote suggest this (“Old Torglork has sent hundreds like you to the depths! Time to join them!”), but the vignette for killing him is called ‘Sea Lord Torglork‘ in the game files.
None of this made much sense before Tanaan was launched. However, venturing down to the beach, south of the entrance to the Cave of Betrayal, reveals the missing pieces of the puzzle. Here, next to a beached boat and a smouldering fire, you will find the corpse of Trogra, the third mate on Ironbeard’s ship. The Sea-kissed Scroll next to her explains all about Torglork’s betrayal, and why Ironbeard still haunts the site of his death (trust a Warlock to get it wrong…). The extremely useful Brazier of Awakening can also be found in the nearby hut.
Wait, what? Yes, head back to the cave (make sure to pick up the Snake Charmer’s Flute, from the end of the river, on the way – it contains an instrument in the finest traditions of orcish music: a stick with a rock tied to it (Ogra’mal Snake Charming Flute)) and you will find Captain Ironbeard – he can spawn before you read the scroll, but this seemed like a more dramatic way to reveal it.

Like Torglork before him, Ironbeard attacks with Shrapnel Blast. No grenades here, though – the orc is much too far gone to deal with explosives. Instead, he will try to stick you with his Rusty Shank, while intimidating you with Howling Roar. For a reward, you have a chance to loot the Ghostly Iron Buccaneer’s Hat and another precious shipyard item, the Equipment Blueprint: Ghostly Spyglass.
* Of course, you could use the Throbbing Blood Orb to invalidate the jumping puzzles, but where’s the fun in that?